
Cocktail Photography in 5–8 Minutes: Repeatable Setups for Amateurs
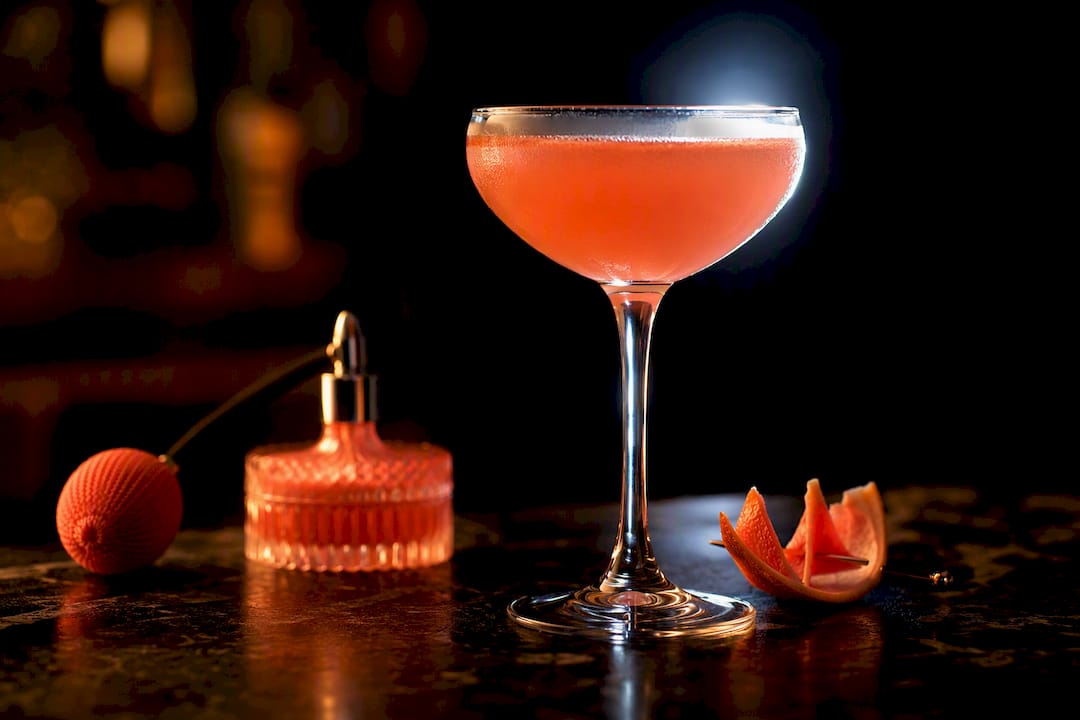
The single biggest upgrade you can make to your cocktail shots is controlling side or back transmission light and building the drink in a strict, timed sequence, so your hero frame gets shot before ice, foam, or garnish start to fail. That means prepping the glass, freezing or sourcing clear ice, keeping a glycerin spray to hand, and pouring last. Sources like FoodShot AI back this workflow, and it's the same sequence Alex Gell uses on commercial menu shoots.
TL;DR:
- Proper light control involves positioning the light behind or to the side of the glass and using reflectors to minimize reflections and hotspots.
- Using long focal length lenses and specific angles tailored to each glass shape helps maintain accurate proportions and prevents distortion.
- Timing is critical; shoot the hero frame immediately after pouring before ice, foam, or garnish deteriorate, especially when using real ice or foam.
- A consistent shoot sequence, including testing with water and prepping garnishes in advance, prevents wasted pours and ensures repeatability.
- Budgeting five to eight minutes per drink allows for proper setup, pouring, and capturing multiple shots when working with clear ice and fast-decaying elements.
Table of Contents
- Cocktail photography ideas: the quick-start kit worth buying first
- Three lighting setups you can shoot on repeat
- Which angle flatters which glass
- Ice, condensation and the clock you're racing against
- Styling ideas and prop palettes for three distinct moods
- Composition rules that turn a drink into a story
- Camera settings and phone tricks that save time on set
- A repeatable shoot sequence that stops you wasting pours
- Editing that makes colour pop without looking artificial
- How a commercial photographer actually plans a cocktail shoot
- What I learned the hard way about sequencing
- Need commercial-grade cocktail imagery, not just better phone shots?
- Sources
- FAQ
Cocktail photography ideas: the quick-start kit worth buying first
You don't need a studio to shoot cocktails that look like they belong on a menu. You need a handful of cheap, purposeful tools and the discipline to use them in order. Most amateur shots fail not because of bad gear but because the shooter is fighting reflections and melting ice at the same time, with no plan for either.
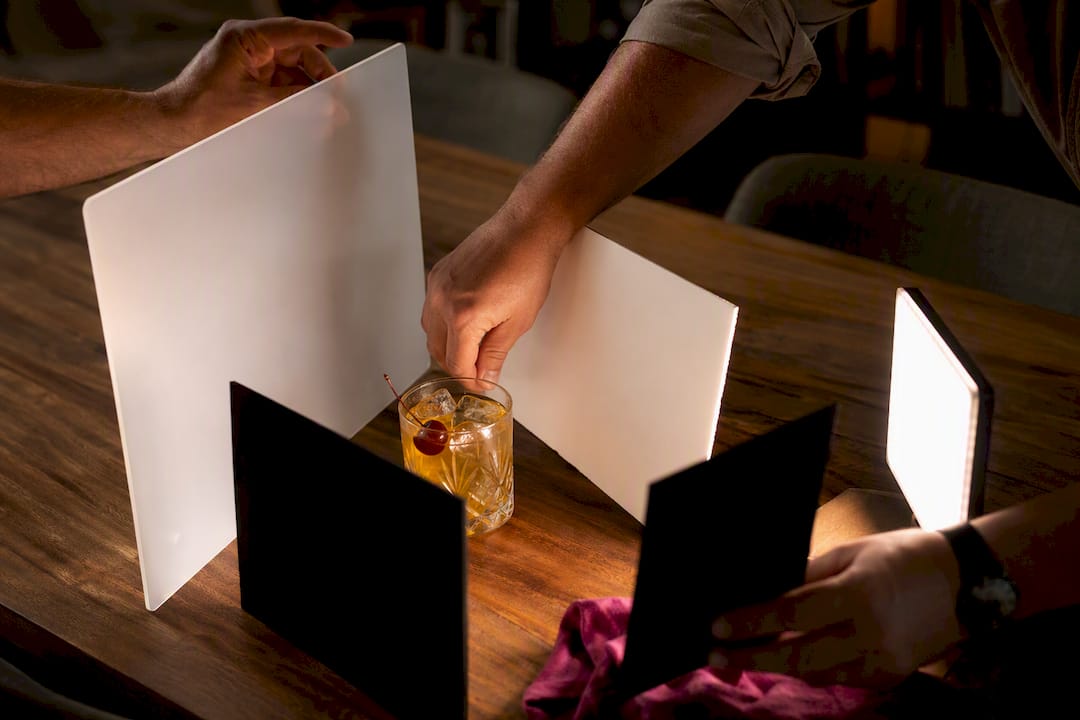
Start with light control. A single LED panel or softbox, one diffuser panel, a white foamboard reflector, and two black cards will get you further than any lens upgrade. The foamboard bounces fill back into shadows; the black cards kill unwanted reflections on the glass. Add a small spray atomiser loaded with a glycerin and water mix, because manufactured condensation lasts far longer under hot lights than the real thing.
On the camera side, longer focal lengths flatter glassware. An 85mm-equivalent lens, or a phone's 2x/3x telephoto module, keeps rims and bowls from bulging the way a wide lens does when you shoot close. A tripod locks your composition steady between test pours and the real one, and a microfiber cloth with a dab of isopropyl alcohol should live in your kit permanently. Fingerprints on glass ruin more shots than bad lighting.
For props, keep a repeatable starter set:
- A plain slate or timber board as a neutral surface
- Two or three unpatterned linen napkins in different tones
- A citrus peeler and bar spoon, both for prep and as compositional props
- A handful of cocktail picks and skewers
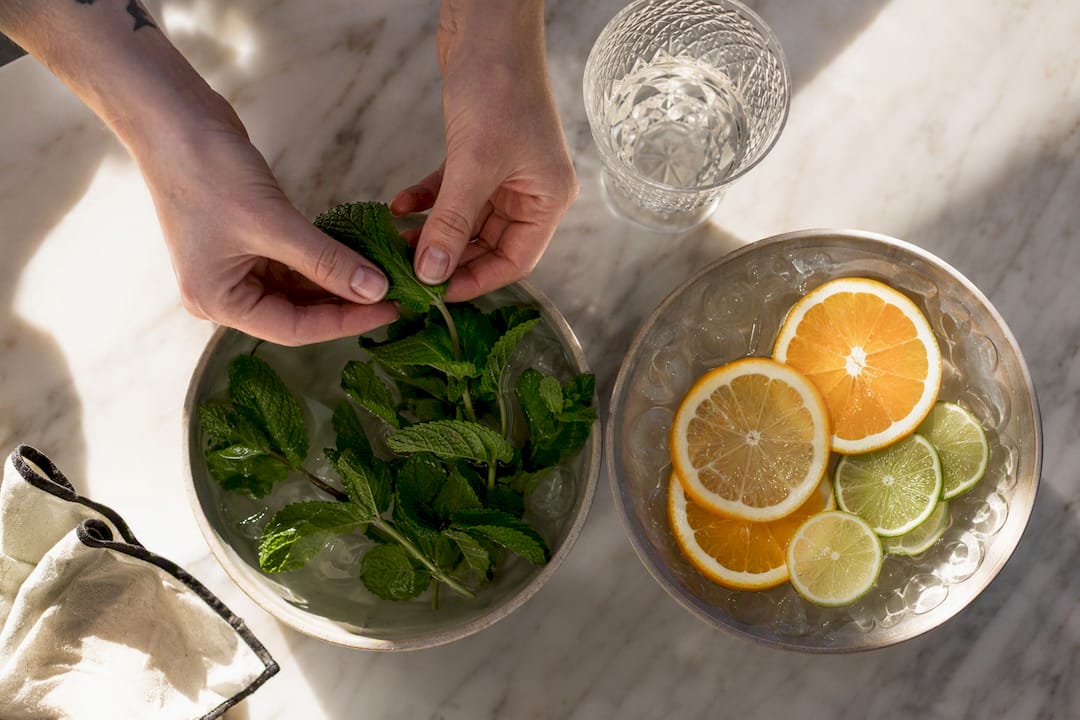
- Spare garnishes stored in iced water as backups
- A small stash of clear acrylic ice cubes for long sessions
That kit covers roughly 90% of the situations you'll face shooting drinks at home, in a bar, or on location.
Three lighting setups you can shoot on repeat
Reflections make or break a cocktail photo, and almost every failed shot traces back to light hitting the glass from the wrong angle. Three rigs cover most beverage work, and FoodShot AI's breakdown of bar and menu photography confirms these are the ones professionals return to again and again.
- Natural side-back window rig. Position the glass roughly 60 to 90cm from a north-facing window, with the light source behind and slightly to the side of the drink rather than in front. Place a white foamboard on the opposite side to bounce fill into the shadow. Choose this setup when you want a softer, more editorial look and have consistent daylight. Skip it on bright, direct sun days unless you diffuse hard.
- Single softbox at 11 o'clock. This is the workhorse for menu shoots. Set a softbox behind and to the left of the glass, roughly where an 11 o'clock hand would sit on a clock face if you're facing the drink. Diffuse it fully, then add a black card at 4 to 5 o'clock as negative fill to deepen contrast on the near side of the glass. One-light side-back setups eliminate around 80% of the reflections that make beginner shots look flat, and the white foamboard fill restores shape without reintroducing glare.
- Dual-source editorial rig. For a polished hero frame, combine the 11 o'clock softbox as your key light with a small secondary light directly behind the glass, slightly lower, aimed to pass light through the liquid. This second source is what makes amber spirits and red garnishes genuinely glow rather than just look lit.
Pro Tip: Before you pour anything, fill the glass with plain water and shoot a test frame. Water reveals every reflection and hotspot your lighting rig produces, and it costs you nothing when you get it wrong.
Which angle flatters which glass
Every glass shape has an angle that makes it look intentional rather than accidental, and getting this wrong is the fastest way to make a well-styled drink look amateurish.
- Stemmed glasses and coupes: shoot dead level, straight on, at table height. Anything above or below the rim line distorts the bowl and makes the stem look stubby.
- Highball glasses: work best at 30 to 45 degrees, angled slightly down. This shows the liquid layers and garnish without flattening the tall silhouette.
- Layered cocktails: need a pure 0-degree side view. Any tilt blurs the boundary lines between layers, which is the entire point of the shot.
- Lowball or rocks glasses: are flexible. A 30-degree angle shows the ice and garnish; a flat-lay from directly above works if the drink has a strong garnish or rim treatment worth showing from the top.
Focal length matters as much as angle. Shooting close with a wide lens bulges the rim outward and makes round glasses look egg-shaped. Step back and use a longer lens instead. Moving back and using an 85mm-equivalent or a phone's telephoto module keeps the glass's true proportions intact, which matters more on stemware than on straight-sided tumblers.
Before you commit to a pour, check two things through the viewfinder: does the liquid line sit perfectly horizontal, and does the rim read as a true ellipse rather than a lopsided oval? If either looks off, adjust your camera height rather than the glass. Tilting the glass to fix a composition problem almost always looks wrong once the ice settles.
Ice, condensation and the clock you're racing against
Ice is the part of a cocktail shot that decays fastest, and planning around its timeline separates usable shots from wasted pours.
For genuinely clear ice, directional freezing works reliably at home: fill an insulated cooler with water and leave it in a chest freezer for 24 to 36 hours. Freezing from the top down forces air bubbles and impurities toward the bottom, so you can cut the clear top portion into bar-grade cubes. It takes patience but costs nothing beyond a cooler and a day and a half of freezer space.
For longer shoots, acrylic ice is a legitimate shortcut. It stays perfectly clear indefinitely, but lacks any natural condensation, which you replace by hand. A 50:50 glycerin-to-water mix in a fine atomiser produces droplets that hold their shape far longer under hot lights than real condensation, which tends to evaporate or run within minutes.
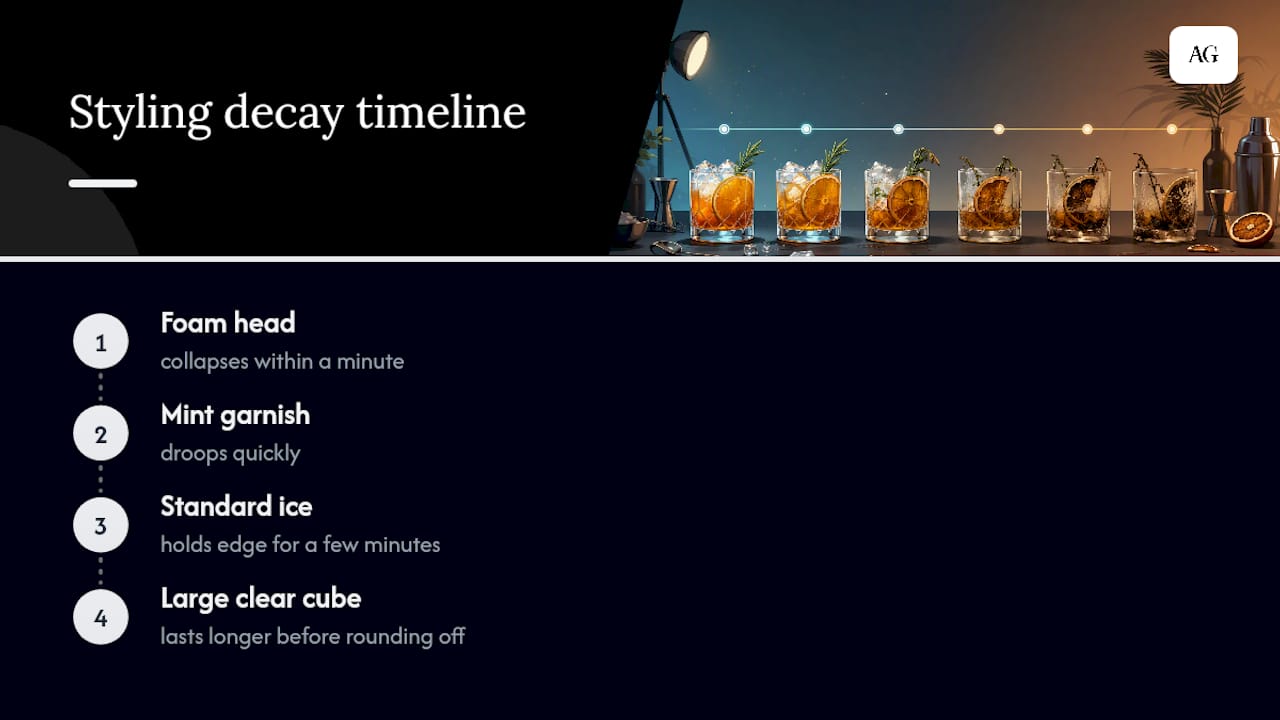
Timing benchmarks worth memorising before you start pouring include foam heads collapsing within a minute, mint garnish drooping quickly, standard ice cubes holding their edge for a few minutes, and large clear cubes lasting longer before they start to round off.
Statistic Callout: A one-light side-back setup removes roughly 80% of the reflections causing flat, amateur-looking results, but that advantage evaporates fast if you're still adjusting lights after the ice has been poured. Shoot the hero frame inside your fastest window, then work outward to safer, slower shots.
Styling ideas and prop palettes for three distinct moods
Props do more work than most amateur photographers give them credit for. The right surface and texture combination can carry a mediocre pour, while the wrong one undermines a beautifully made drink.
- Moody and dramatic. Pair a dark slate or reclaimed wood surface with a black linen napkin, a single brass jigger, a smoked citrus twist, dried orange wheels, a pewter bar spoon, and low warm-toned garnish like charred rosemary.
- Bright and fresh. Use a pale oak or whitewashed board, a linen napkin in cream or sage, fresh mint sprigs, cucumber ribbons, a copper mule mug, edible flowers, and a wedge of citrus with visible pulp texture.
- Festive and celebratory. Go for a marble or brass surface, a metallic-thread napkin, gold-rimmed coupes, sugared rims, a small dish of pomegranate seeds, star anise, and a mini bottle or two as background props.
Whatever palette you choose, apply the rule of odds: group props in threes rather than pairs, since odd numbers read as more natural and less staged to the eye. Choose props that echo an ingredient actually in the glass, not just something that looks nice, because viewers notice when a garnish doesn't match the drink description.
Thrift shops and market stalls are genuinely useful sources for mismatched brass, vintage glassware, and interesting textiles that look expensive but cost very little. Whatever garnish you're using as your hero element, prepare at least two backups sitting in iced water. Stylists treat garnishes as perishable props, because a wilted mint sprig or browning citrus wheel can quietly ruin an otherwise perfect frame.
Composition rules that turn a drink into a story
A cocktail photo works when it does more than document the drink; it should suggest a moment. Three composition habits get you there quickly.
- Place the glass off-centre using the rule of thirds, leaving negative space on one side to give the eye somewhere to rest.
- Use garnish stems, condensation trails, or a bar spoon as leading lines that draw the eye toward the glass.
- Isolate the subject with a blurred or plain background when the drink itself is the story, and widen the frame to include hands, bottles, or a bar counter when the setting matters.
Three micro-narratives are worth keeping in your back pocket. The hero-coupe shot: single glass, tight crop, dramatic side-back light, nothing else in frame. The mid-pour shot: a bartender's hand caught mid-action, spirit or garnish frozen in motion, shot at a faster shutter speed to keep it sharp. The ingredient flat-lay: the finished drink surrounded by its raw components, shot from directly above to tell the story of what went into the glass.
Crop tight when the glass and garnish are strong enough to carry the frame alone. Pull back and include environment when context adds meaning, such as a bar's ambient lighting or a table setting that signals occasion.
Camera settings and phone tricks that save time on set
Aperture choice depends on what you're isolating. For a single glass against a soft background, sit somewhere between f/4 and f/8 to keep the drink sharp while letting the background fall away gently. If a label or garnish detail needs to stay crisp front to back, tighten up to around f/11.
For pour or motion shots, raise your shutter speed to at least 1/250s to freeze falling liquid without blur, and if you're using flash, check your camera's sync speed limit before you commit to a series of action frames.
Phone shooters aren't at a disadvantage if they use the tools properly:
- Switch to the telephoto module (2x or 3x) rather than the standard wide lens to avoid glass distortion
- Lock exposure and focus manually by tapping and holding on the glass before shooting
- Shoot in RAW or Pro mode if your phone supports it, since it gives you far more room to correct colour later
A repeatable shoot sequence that stops you wasting pours
Cocktail shoots go wrong when the photographer starts pouring before everything else is ready. A fixed sequence removes that risk entirely.
- Clean the glass thoroughly with a microfiber cloth and isopropyl alcohol.
- Set your composition and lighting using a stand-in glass filled with water.
- Lock exposure, focus, and framing once you're happy with the test frame.
- Prepare garnishes and have backups sitting in iced water.
- Pour the real drink and add ice immediately before it dilutes.
- Shoot your hero frame first, while ice, foam, and garnish are all at their freshest.
- Move on to secondary angles and detail shots once the hero frame is safely captured.
If you need multiple pours of the same drink for reshoots, acrylic ice and a glycerin spray let you rebuild the look almost identically without waiting for a fresh freeze. For high-volume menu work, budget roughly five to eight minutes per drink once your lighting is dialled in, since large clear cubes only hold their sharp edges for three to five minutes.
Pro Tip: Shoot your hero frame the moment the pour settles, not after you've fiddled with the garnish for the tenth time. You can always shoot a second, more careful frame afterwards, but you can't undo a collapsed foam head.
Editing that makes colour pop without looking artificial
Indoor lighting, especially warm bar bulbs, tends to skew whites toward amber. Pull your white balance down to somewhere between 4,000 and 4,500K to correct that shift before you touch anything else, then reach for vibrance rather than saturation, since vibrance protects skin tones and whites while still deepening the jewel colours in the drink itself.
Use HSL adjustments to isolate and lift the specific hues in your cocktail, whether that's reds in a Negroni or golds in an Old Fashioned, rather than pushing global saturation and muddying everything else in frame.
For export, size images for their destination: roughly 2048px on the long edge for social platforms, and higher resolution with light sharpening for printed menus. If you're retouching condensation, keep droplets irregular and slightly uneven; perfectly uniform beads read as fake immediately. A simple workflow covers most images: adjust globally first, recover local highlights and shadows second, then apply your export preset last.
How a commercial photographer actually plans a cocktail shoot
Professional shoots start with a shot list, not a camera. Alex Gell plans menu and bar photography around the venue's busiest service times avoided, multiple drinks batched by garnish type, and backup ice and glassware on hand before a single pour happens, work reflected across event and hospitality photography case studies.
Consistency across a menu matters as much as any single shot. That means locking white balance and framing across every drink so a customer's menu doesn't look like six different photographers shot it. If you're weighing DIY against hiring a professional, ask yourself three questions: do you need more than five or six drinks shot to a consistent standard, is this for commercial use where licensing matters, and do you have a firm deadline you can't afford to miss? Two or more "yes" answers usually means it's worth commissioning a professional.
— Alex
Need commercial-grade cocktail imagery, not just better phone shots?
There's a real ceiling to what a spray bottle and a softbox can achieve when you need a full menu shot on a deadline, consistent across twenty drinks, with usage rights sorted for print and social. Alex Gell handles exactly that gap: menu imagery, bar and event hero frames, and quick-turnaround commercial licensing, all shot with the same build-and-sequence discipline covered above but scaled to a full bar list in a single session.
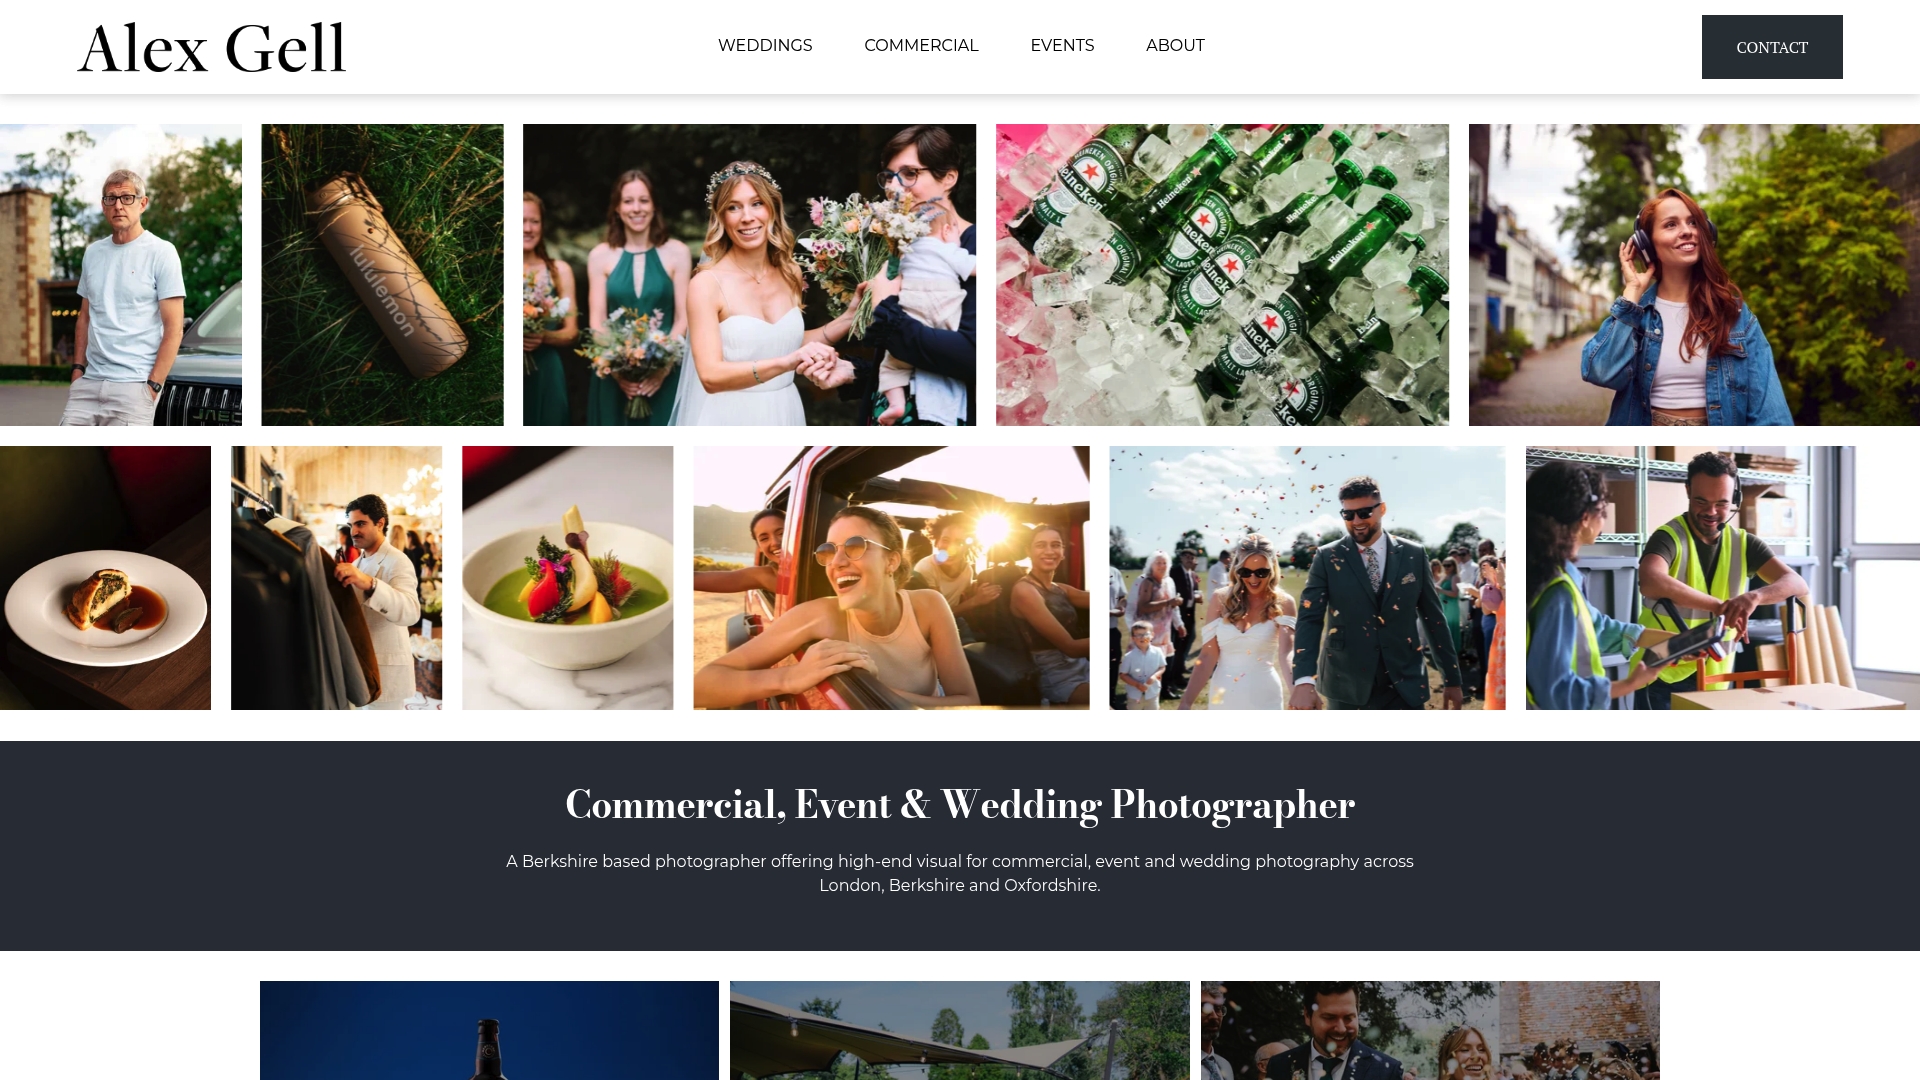
Restaurants and bars across London and the South East commission this kind of work when they need every drink on the menu photographed to one consistent standard, without spending a week testing lighting rigs themselves. If that's where you are, the Commercial Photographer London page has details on turnaround and licensing, and you can browse past bar and hospitality work before getting in touch about your own menu.
Sources
- How to photograph bottles and glass products | Amateur Photographer
- Cocktail photography: pro tips for bars & menus | FoodShot AI
- Drink styling: how to style drinks for photography | Food & Drink Styling
FAQ
How do you take a good photo of a cocktail?
Control your light source, position it to the side or behind the glass rather than in front, and shoot your hero frame immediately after pouring, before ice, foam, or garnish start to degrade.
What is the 20-60-20 rule in photography?
It's a lighting balance guideline suggesting roughly 20% of a scene sits in deep shadow, 60% in mid-tones, and 20% in bright highlights, which helps a cocktail shot avoid looking either flat or blown out.
What is the 2:1:1 rule for cocktails?
It's a classic mixology ratio (two parts spirit to one part sweet to one part sour) rather than a photography rule, though understanding it helps you predict a drink's colour and clarity before you light it.
What are some creative photography ideas for cocktails?
Try a mid-pour action shot frozen with a fast shutter, an ingredient flat-lay showing every component around the finished drink, or a moody single-glass hero shot lit purely from behind to make the liquid glow.
